FOUNDATION
·
STEP D1 · 01 OF 8
01
Place the foot plates
First action on the slab — anchor plates set the system footprint.
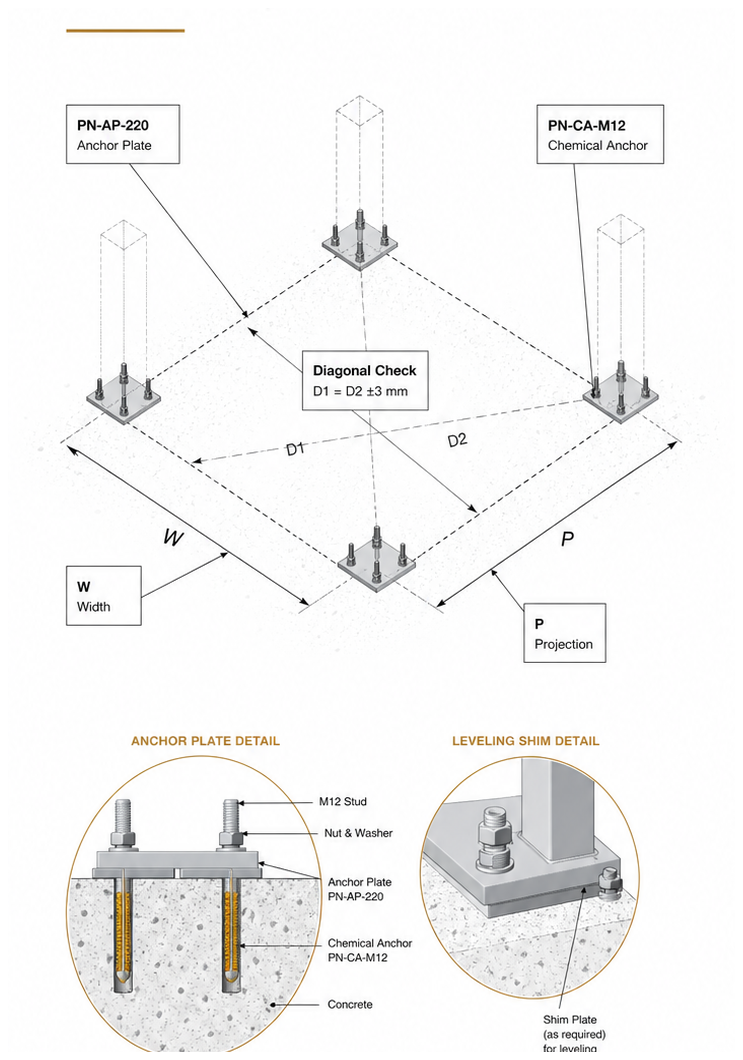 Fig. 01 — Place the foot plates
- 1Mark the four corner positions according to the site survey.
- 2Verify the W x P footprint and confirm both diagonals match within tolerance.
- 3Drill anchor holes and inject chemical anchor resin.
- 4Insert M12 studs and allow the specified cure time.
- 5Set each anchor plate level with shims and tighten the nuts.
- 6Confirm all four plates are coplanar before proceeding.
- Anchor plate: 220 x 220 x 12 mm anodised aluminium
- Anchor type: M12 chemical anchor
- Hole: Ø14 mm x 90 mm depth
- Torque: 60 Nm
- Tolerance: diagonals ±3 mm, coplanar ±2 mm
Measure both diagonals before drilling to prevent column misalignment.
Do not install plates near slab edges or expansion joints.
Tape measure, chalk line, hammer drill, torque wrench, spirit level
52 min
About step 1 of the Luxa Sereno 700 installation
Place the foot plates · FOUNDATION · 8 step · Luxa Sereno 700 (bioclimatic pergola)
First action on the slab — anchor plates set the system footprint.
Nearby steps in this installation
← Back to the full Luxa Sereno 700 installation guide

